使用 ssh 远程登录时:
- 输入
ssh root@host-ip - 输入密码
每次都重复这样的操作,不仅麻烦,还要记忆好多东西,为了解决这个问题,借助 iTerm2 Profile 可以实现 ssh 自动登录:
- 编写 expect 脚本
- 使用此脚本创建 Profile
- 使用此 Profile 打开新标签页
编写 expect 脚本
1 | #!/usr/bin/expect |
把上面的脚本保存为 /usr/local/bin/login.exp 并为其加上可执行权限 chmod +x /usr/local/bin/login.exp,这个脚本接收 3 个参数: 用户名、远程主机 IP、密码。
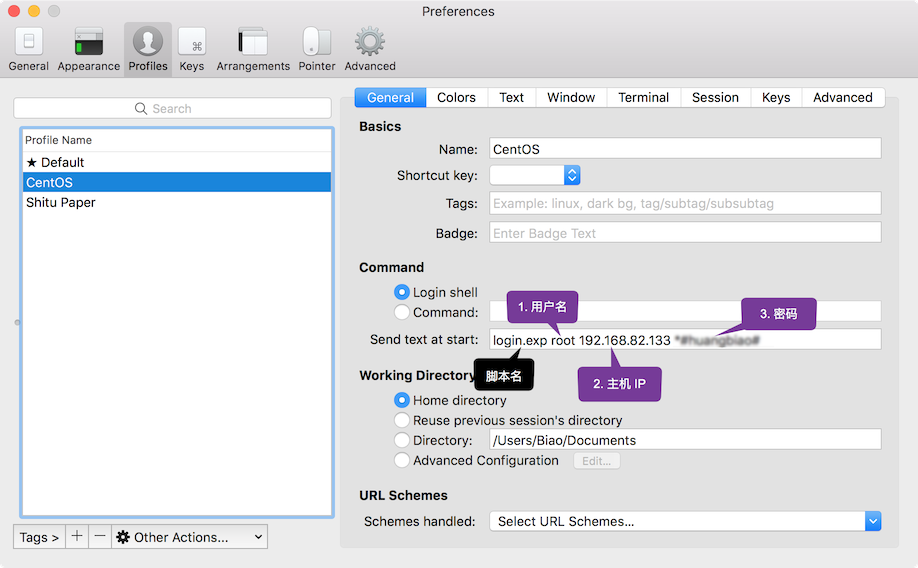
使用此脚本创建 Profile
打开 iTerm2 的配置窗口(快捷键CMD + ,),找到 Profiles,点击左下角的 + 创建一个 Profile,参考如下配置:
小提示:如果设置了 iTerm2 启动时打开
Hotkey Window,那么每个设置为 Hotkey Window 的 Profile 都会对应的打开一个窗口,有多个 Profiles 一下会打开好多,可以在 Profile 的 Keys 中设置是否为Hotkey Window。
Hotkey Window: 使用快捷键可以打开和隐藏此 Profile 的窗口。如果密码中有特殊字符例如 @ 之类,可把密码放在单引号中,如 ‘xxx@yyy’。
使用此 Profile 打开新标签页
使用配置好 SSH 的 Profile 打开新标签页时就进行自动登录了: